3d-printer-user-guide: Difference between revisions
Aspontarelli (talk | contribs) Created page with "{| |width="33%"| '''Shop Area:''' Digital Fabrication '''Tool:''' 3D Printing '''Requires in-person training:''' No |width="33%"| '''Procedure Number''' UG 120-01, Rev. 0 |..." |
Tag: Manual revert |
||
| (51 intermediate revisions by 5 users not shown) | |||
| Line 1: | Line 1: | ||
{| | {| | ||
|width="33%"| | |width="33%"| | ||
'''Shop Area:''' | '''Shop Area:''' Rapid Prototyping | ||
'''Tool:''' 3D | '''Tool:''' 3D Printers | ||
'''Requires in-person training:''' No | '''Requires in-person training:''' No | ||
| Line 9: | Line 9: | ||
'''Procedure Number''' | '''Procedure Number''' | ||
UG 120-01, Rev. | UG 120-01, Rev. 2 | ||
|width="33%"| | |width="33%"| | ||
'''Date''' | '''Date''' | ||
7/26/2021 | |||
|} | |} | ||
<gallery> | |||
File:20251216_083330_edit.jpg|thumb|Prusa Core One Rack|alt=Prusa Core One | |||
File:20251216_084625_edit.jpg|Prusa Misc Rack | |||
File:Prusa-mk4s1.jpg|thumb|none|350x233px|alt=prusa mk4s1|Prusa mk4s1|link=http://mk4s1.vector-space.org | |||
File:Prusa-mk4s2.jpg|thumb|none|350x233px|alt=prusa mk4s1|Prusa mk4s2|link=http://mk4s1.vector-space.org | |||
File:Prusa-mk3.jpg|thumb|none|350x233px|alt=prusa mk3|Prusa MK3|link=http://mk3.vector-space.org/ | |||
File:Prusamk4.jpg|thumb|none|350x233px|alt=prusa mk4|Prusa mk4 | |||
File:Voron2.jpg |thumb|none|350x233px|alt=Voron2|Voron 2 | |||
File:20250305 103512.jpg|thumb|none|350x233px|alt=Voron Trident|Voron Trident | |||
File:LulzbotTaz6.JPG|thumb|none|350x233px|alt=Lulzbot TAZ6|Lulzbot TAZ6 | |||
</gallery> | |||
= | = General = | ||
This document is a guide for using the following 3D Printers: | |||
* Lulzbot Mini | * Lulzbot Mini 2 | ||
* Lulzbot TAZ6 | * Lulzbot TAZ6 | ||
* Gigabot | * Gigabot GB2 | ||
* Prusa Core One | |||
* Prusa Mk3S+ | |||
* Prusa Mk3 | |||
* Prusa Mk4 | |||
* Prusa Mk4s1 | |||
* Voron Trident | |||
* Voron 2.4r2 | |||
The general workflow for 3D printing is as follows: | |||
3D model → Slicer → Printer | |||
= | = Safety = | ||
* Do not remove material from the printer before it has cooled. | * Do not remove material from the printer before it has cooled. | ||
* Clean up clutter, debris and flammable materials at the printer after use. | * Clean up clutter, debris and flammable materials at the printer after use. | ||
= | = Reference = | ||
* Troubleshooting Guide (https://www.simplify3d.com/support/print-quality-troubleshooting/) | |||
* Cura Profiles | |||
** LulzBot (https://www.lulzbot.com/mini-cura-profiles) | |||
** GigaBot (https://re3d.zendesk.com/hc/en-us/articles/360037613411-Gigabot-Printing-Profiles-Simplify3D-Slic3r-Cura-) | |||
= Procedure = | |||
== Design == | |||
In order to print, you must have an STL file created in a CAD software. These can either be obtained online or you can create them yourself. | |||
=== Obtaining STLs via Thingiverse or Printables === | |||
# Go to the Thingiverse website (https://www.thingiverse.com) or Printables (https://www.printables.com/) | |||
# Click the Search bar at the top and type in what you’re looking for, then hit Enter. | |||
# Select a thing by clicking on it. | |||
# Click “Download All Files”. This should download the STL(s) necessary for creating the print. | |||
=== Using TinkerCad for 3D Modeling === | |||
# Visit TinkerCad’s website (https://www.tinkercad.com) | |||
# Create your account if you have not done so already. Then, log into your account. | |||
# Click “Create New Design” on your dashboard. | |||
# Create your design. <br /> ''For an introduction on how to use TinkerCad, visit https://www.tinkercad.com/learn.'' | |||
# Click “Export” on the top right and ensure that “The Entire Design” is checked. Then, select “STL” on the popup. This should download the STL necessary for creating the print. | |||
==== Exporting Certain Selections ==== | |||
In TinkerCad, you may only want to export certain parts of your 3D object to an STL (for example, in multi-part prints or for dual extrusion). | |||
# Select the parts you want to include in the STL file. <br /> ''Use Ctrl+Click to select multiple items.'' | |||
# Click “Export on the top right and ensure that “The Selected Shape” is checked. Then, select “STL” on the popup. This should download an STL with the current selection. | |||
== Slicing and Printing == | |||
All printers are connected to OctoPrint servers, which allows for remote access within the Space. | |||
Both LulzBots have PrintBite surfaces on the beds, and therefore do NOT need a glue stick, blue tape, etc. to adhere. | |||
''Note: As we are transitioning to OctoPrint, some functionality may not be set up yet, such as having Cura fully configured. Please bear with us as we get everything reconfigured.'' | |||
=== Slicing with PrusaSlicer === | |||
PrusaSlicer is an open-source 3D model slicing software. Files from here can uploaded to the printers through Octoprint. | |||
# Start PrusaSlicer. | |||
## Open the Applications menu on your computer and click “Graphics” → “PrusaSlicer” | |||
## In the right pane, select the profiles for print settings (quality), filament, and printer. | |||
## Open your STL file by clicking “Add” at the top left. | |||
# Configure the print as needed. | |||
## Ensure your material selection matches what is loaded in the printer. | |||
##If you want to tweak the temperature, click the gear icon next to “Filament”. | |||
# Slice by clicking "Slice Now" at the bottom right. | |||
# Send to printer by clicking the "G->" at the bottom right. | |||
==== Print Management via Octoprint ==== | |||
Connect to the Octoprint server for your printer. | |||
#* Taz: <code>http://taz.vector-space.org</code> | |||
#* Mini: <code>http://mini.vector-space.org</code> | |||
#* Gigabot: <code>http://gigabot.vector-space.org</code> | |||
#* Prusa MK3: <code>http://mk3.vector-space.org</code> | |||
# Log in using the credentials found printed on the sign at the printers. | |||
# Use these interfaces to cancel prints, adjust temperatures, or re-print old files | |||
<BR> | |||
Connect to PrusaLink | |||
#* Prusa MK4: <code>http://mk4.vector-space.org/</code> | |||
#* Prusa MK4S1: <code>http://mk4s1.vector-space.org/</code> | |||
#* Prusa MK4S2: <code>http://mk4s2.vector-space.org/</code> | |||
#* Prusa Core One Archimedes: <code>http://10.0.0.122/</code> | |||
#* Prusa Core One Conway: <code>http://10.0.0.123/</code> | |||
#* Prusa Core One Descartes: <code>http://10.0.0.124/</code> | |||
#* Prusa Core One Bertrand: <code>http://10.0.0.125/</code> | |||
# <mark>The username for PrusaLink on the MK4 is "maker", and the password is a randomly generated alphanumeric string <BR> | |||
that can be found in the printer's network settings under PrusaLink</mark>. You can access these settings on the printer's <BR> | |||
LCD screen by navigating to Settings > Network > PrusaLink. The password is not user-changeable and is randomly generated by the printer. | |||
# Use these interfaces to cancel prints, adjust temperatures, or re-print old files | |||
<BR> | |||
* | Connect to Voron Web Interface | ||
* | #* Voron: 2 <code>http://voron2.vector-space.org/</a></code> | ||
#* Voron: Trident <code>http://trident.vector-space.org/</a></code> | |||
# Log in using the credentials found printed on the sign at the printers. | |||
# Use these interfaces to cancel prints, adjust temperatures, or re-print old files | |||
. | |||
==== Printing via SD Card ==== | |||
''Note: Printing from an SD card bypasses OctoPrint COMPLETELY, which may cause issues with OctoPrint. Use this method only if OctoPrint is non-functional. Again, we discourage printing from SD cards.'' | |||
# Load the SD card into the Gigabot or Taz 6. | |||
## Make sure to reboot the printer by turning the power switch off, waiting for the LCD screen to turn off, and then turning the power switch back on again. This will allow it to recognize the SD card. | |||
# Use the printer's LCD interface to open your GCODE file for printing. | |||
## Press the control knob to open the main menu. | |||
## Scroll to “SD Card”, select it, and then scroll to the file you want to print. | |||
## Once selected, the printer will begin the printing process automatically. | |||
== Filament == | |||
The Lulzbots and Gigabot use 2.85 or 3mm filament. They can also use 1.75mm filament, but the likelihood of failure is much higher. | |||
=== Filament Configuration === | |||
These are the suggested temperatures for printing. | |||
''Note: All temperatures are written in Celsius. If any information should be added or adjusted, please contact Dustin Thomas via Slack.'' | |||
{| class="wikitable" | |||
|- | |||
! style="text-align:left;" |Filament | |||
! Extruder Temp | |||
! Bed Temp | |||
! Cooling fan? | |||
! Special Instructions | |||
|- | |||
| PLA || 180-220°C || 55-65°C || || | |||
|- | |||
| ABS || 220-235°C || 80-110°C || || | |||
|- | |||
| PETG || 220-225°C || 60-85°C || || | |||
|- | |||
| NinjaFlex N95 || 190-200° || Room Temp-50°C || After first layer || | |||
|} | |||
=== Replacing Filament === | |||
# Select the filament you would like to load. | |||
# Heat the extruder head. | |||
## Log onto the OctoPrint control panel for the printer you are replacing filament in. | |||
## Open the “Temperature” tab. Set the temperature on the tool you want to heat to the melting point of the filament you are using. | |||
# Replace the filament. | |||
## Undo the latch on the extruder, and remove the filament currently in the printer. | |||
## Cut a small amount of filament off of the new filament at about a 45 degree angle to assist in loading. <br /> ''The tool is found in the 3d printing tool drawer.'' | |||
## Manually push the filament into the extruder until it extrudes out the hot nozzle. Re-latch the extruder bearing. | |||
# Turn off the heater. | |||
## Click the arrow next to the checkmark button and select “Off”. | |||
= Troubleshooting = | |||
== | == Common Errors == | ||
If the printer has a software error, Octoprint will kill the printer. While the error displayed on the printer may not be informative, the Octoprint console should give some more information. | |||
=== Probing Failure === | |||
A probing failure usually means that the printer could not probe one of the four corners successfully. This could be caused by a few potential issues. | |||
* First, try cleaning the nozzle with one of the green pads. | |||
* If that doesn't fix the issue, check the leveling of the print bed. This can be fixed using [https://ohai.lulzbot.com/project/leveling-x-axis/maintenance-repairs/ this procedure]. | |||
== Extrusion == | |||
=== Unclogging Printer Hot End === | |||
''If you have been using PLA or PLA-based materials, you shouldn't set the temperature past 230°C. Do not let PLA sit at high temperatures near 230°C for extended periods of time. If you have been using other filaments you can set the temperature higher up to 290°C.'' | |||
If there is no filament flow at all: | |||
# Turn temperature up to 230°C if using PLA-based filament, or 290°C for other materials and allow nozzle to reach temperature. | |||
# Open extruder idler. | |||
# Pull filament out of the extruder. | |||
# Trim off end of filament. | |||
# Push filament back down into the extruder and see if you can get any filament out. You can push fairly hard against the extruder to get this to work. | |||
# Pull filament back out, see if there is anything stuck to the filament and trim off again. | |||
# Repeat process several times to see if you can get nozzle flowing again. | |||
If there is flow but it seems partially blocked, thin, or is "pig-tailing" out of the nozzle: | |||
# Using either HIPS or PLA turn your nozzle to the proper temperature for that material. | |||
# Once up to temperature, extrude several mm of filament. | |||
# Turn your temperature down, for HIPS use 140°C, for PLA use 100°C. | |||
# Once the temperature is reached, open the extruder idler and pull out the filament. <br /> ''You should have a perfect mold of the inside of the hot end. The end of the filament should taper to a cylinder that is the size of your nozzle and have a nozzle sized cylinder that is about 1mm long.'' | |||
# Check for foreign particles or gaps in your mold of the nozzle. | |||
# Repeat steps as necessary for cleaning the extruder nozzle. | |||
== Adhesion == | |||
= | === Print Lifting from Bed === | ||
Clean the bed surface with soapy water. Do NOT use abrasives or strong chemicals like isopropyl alcohol. | |||
=== Print Stuck to Bed === | |||
Heat the bed to about 50°C to loosen the printed part, then the part should come off with relative ease. | |||
=== Print Not Adhering to Bed === | |||
''Do NOT use a glue stick, blue tape, or other adhesives as advised by the internet. The PrintBite bed surfaces will be damaged with these tactics.'' | |||
Find the correct temperature and orientation for your print and it will adhere well. You can also try adding a brim or making your brim larger. | |||
'''END OF THE PROCEDURE''' | |||
Latest revision as of 09:55, 3 February 2026
|
Shop Area: Rapid Prototyping Tool: 3D Printers Requires in-person training: No |
Procedure Number UG 120-01, Rev. 2 |
Date 7/26/2021 |
-
 Prusa Core One Rack
 -
 Prusa Misc Rack
 -
 Prusa mk4s1
 -
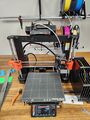 Prusa mk4s2
 -
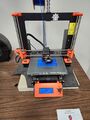 Prusa MK3
 -
 Prusa mk4
 -
 Voron 2
 -
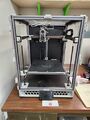 Voron Trident
 -
 Lulzbot TAZ6


General
This document is a guide for using the following 3D Printers:
- Lulzbot Mini 2
- Lulzbot TAZ6
- Gigabot GB2
- Prusa Core One
- Prusa Mk3S+
- Prusa Mk3
- Prusa Mk4
- Prusa Mk4s1
- Voron Trident
- Voron 2.4r2
The general workflow for 3D printing is as follows:
3D model → Slicer → Printer
Safety
- Do not remove material from the printer before it has cooled.
- Clean up clutter, debris and flammable materials at the printer after use.
Reference
- Troubleshooting Guide (https://www.simplify3d.com/support/print-quality-troubleshooting/)
- Cura Profiles
Procedure
Design
In order to print, you must have an STL file created in a CAD software. These can either be obtained online or you can create them yourself.
Obtaining STLs via Thingiverse or Printables
- Go to the Thingiverse website (https://www.thingiverse.com) or Printables (https://www.printables.com/)
- Click the Search bar at the top and type in what you’re looking for, then hit Enter.
- Select a thing by clicking on it.
- Click “Download All Files”. This should download the STL(s) necessary for creating the print.
Using TinkerCad for 3D Modeling
- Visit TinkerCad’s website (https://www.tinkercad.com)
- Create your account if you have not done so already. Then, log into your account.
- Click “Create New Design” on your dashboard.
- Create your design.
For an introduction on how to use TinkerCad, visit https://www.tinkercad.com/learn. - Click “Export” on the top right and ensure that “The Entire Design” is checked. Then, select “STL” on the popup. This should download the STL necessary for creating the print.
Exporting Certain Selections
In TinkerCad, you may only want to export certain parts of your 3D object to an STL (for example, in multi-part prints or for dual extrusion).
- Select the parts you want to include in the STL file.
Use Ctrl+Click to select multiple items. - Click “Export on the top right and ensure that “The Selected Shape” is checked. Then, select “STL” on the popup. This should download an STL with the current selection.
Slicing and Printing
All printers are connected to OctoPrint servers, which allows for remote access within the Space.
Both LulzBots have PrintBite surfaces on the beds, and therefore do NOT need a glue stick, blue tape, etc. to adhere.
Note: As we are transitioning to OctoPrint, some functionality may not be set up yet, such as having Cura fully configured. Please bear with us as we get everything reconfigured.
Slicing with PrusaSlicer
PrusaSlicer is an open-source 3D model slicing software. Files from here can uploaded to the printers through Octoprint.
- Start PrusaSlicer.
- Open the Applications menu on your computer and click “Graphics” → “PrusaSlicer”
- In the right pane, select the profiles for print settings (quality), filament, and printer.
- Open your STL file by clicking “Add” at the top left.
- Configure the print as needed.
- Ensure your material selection matches what is loaded in the printer.
- If you want to tweak the temperature, click the gear icon next to “Filament”.
- Slice by clicking "Slice Now" at the bottom right.
- Send to printer by clicking the "G->" at the bottom right.
Print Management via Octoprint
Connect to the Octoprint server for your printer.
- Taz:
http://taz.vector-space.org - Mini:
http://mini.vector-space.org - Gigabot:
http://gigabot.vector-space.org - Prusa MK3:
http://mk3.vector-space.org
- Taz:
- Log in using the credentials found printed on the sign at the printers.
- Use these interfaces to cancel prints, adjust temperatures, or re-print old files
Connect to PrusaLink
- Prusa MK4:
http://mk4.vector-space.org/ - Prusa MK4S1:
http://mk4s1.vector-space.org/ - Prusa MK4S2:
http://mk4s2.vector-space.org/ - Prusa Core One Archimedes:
http://10.0.0.122/ - Prusa Core One Conway:
http://10.0.0.123/ - Prusa Core One Descartes:
http://10.0.0.124/ - Prusa Core One Bertrand:
http://10.0.0.125/
- Prusa MK4:
- The username for PrusaLink on the MK4 is "maker", and the password is a randomly generated alphanumeric string
that can be found in the printer's network settings under PrusaLink. You can access these settings on the printer's
LCD screen by navigating to Settings > Network > PrusaLink. The password is not user-changeable and is randomly generated by the printer.
- Use these interfaces to cancel prints, adjust temperatures, or re-print old files
Connect to Voron Web Interface
- Voron: 2
http://voron2.vector-space.org/</a> - Voron: Trident
http://trident.vector-space.org/</a>
- Voron: 2
- Log in using the credentials found printed on the sign at the printers.
- Use these interfaces to cancel prints, adjust temperatures, or re-print old files
.
Printing via SD Card
Note: Printing from an SD card bypasses OctoPrint COMPLETELY, which may cause issues with OctoPrint. Use this method only if OctoPrint is non-functional. Again, we discourage printing from SD cards.
- Load the SD card into the Gigabot or Taz 6.
- Make sure to reboot the printer by turning the power switch off, waiting for the LCD screen to turn off, and then turning the power switch back on again. This will allow it to recognize the SD card.
- Use the printer's LCD interface to open your GCODE file for printing.
- Press the control knob to open the main menu.
- Scroll to “SD Card”, select it, and then scroll to the file you want to print.
- Once selected, the printer will begin the printing process automatically.
Filament
The Lulzbots and Gigabot use 2.85 or 3mm filament. They can also use 1.75mm filament, but the likelihood of failure is much higher.
Filament Configuration
These are the suggested temperatures for printing. Note: All temperatures are written in Celsius. If any information should be added or adjusted, please contact Dustin Thomas via Slack.
| Filament | Extruder Temp | Bed Temp | Cooling fan? | Special Instructions |
|---|---|---|---|---|
| PLA | 180-220°C | 55-65°C | ||
| ABS | 220-235°C | 80-110°C | ||
| PETG | 220-225°C | 60-85°C | ||
| NinjaFlex N95 | 190-200° | Room Temp-50°C | After first layer |
Replacing Filament
- Select the filament you would like to load.
- Heat the extruder head.
- Log onto the OctoPrint control panel for the printer you are replacing filament in.
- Open the “Temperature” tab. Set the temperature on the tool you want to heat to the melting point of the filament you are using.
- Replace the filament.
- Undo the latch on the extruder, and remove the filament currently in the printer.
- Cut a small amount of filament off of the new filament at about a 45 degree angle to assist in loading.
The tool is found in the 3d printing tool drawer. - Manually push the filament into the extruder until it extrudes out the hot nozzle. Re-latch the extruder bearing.
- Turn off the heater.
- Click the arrow next to the checkmark button and select “Off”.
Troubleshooting
Common Errors
If the printer has a software error, Octoprint will kill the printer. While the error displayed on the printer may not be informative, the Octoprint console should give some more information.
Probing Failure
A probing failure usually means that the printer could not probe one of the four corners successfully. This could be caused by a few potential issues.
- First, try cleaning the nozzle with one of the green pads.
- If that doesn't fix the issue, check the leveling of the print bed. This can be fixed using this procedure.
Extrusion
Unclogging Printer Hot End
If you have been using PLA or PLA-based materials, you shouldn't set the temperature past 230°C. Do not let PLA sit at high temperatures near 230°C for extended periods of time. If you have been using other filaments you can set the temperature higher up to 290°C.
If there is no filament flow at all:
- Turn temperature up to 230°C if using PLA-based filament, or 290°C for other materials and allow nozzle to reach temperature.
- Open extruder idler.
- Pull filament out of the extruder.
- Trim off end of filament.
- Push filament back down into the extruder and see if you can get any filament out. You can push fairly hard against the extruder to get this to work.
- Pull filament back out, see if there is anything stuck to the filament and trim off again.
- Repeat process several times to see if you can get nozzle flowing again.
If there is flow but it seems partially blocked, thin, or is "pig-tailing" out of the nozzle:
- Using either HIPS or PLA turn your nozzle to the proper temperature for that material.
- Once up to temperature, extrude several mm of filament.
- Turn your temperature down, for HIPS use 140°C, for PLA use 100°C.
- Once the temperature is reached, open the extruder idler and pull out the filament.
You should have a perfect mold of the inside of the hot end. The end of the filament should taper to a cylinder that is the size of your nozzle and have a nozzle sized cylinder that is about 1mm long. - Check for foreign particles or gaps in your mold of the nozzle.
- Repeat steps as necessary for cleaning the extruder nozzle.
Adhesion
Print Lifting from Bed
Clean the bed surface with soapy water. Do NOT use abrasives or strong chemicals like isopropyl alcohol.
Print Stuck to Bed
Heat the bed to about 50°C to loosen the printed part, then the part should come off with relative ease.
Print Not Adhering to Bed
Do NOT use a glue stick, blue tape, or other adhesives as advised by the internet. The PrintBite bed surfaces will be damaged with these tactics. Find the correct temperature and orientation for your print and it will adhere well. You can also try adding a brim or making your brim larger.
END OF THE PROCEDURE